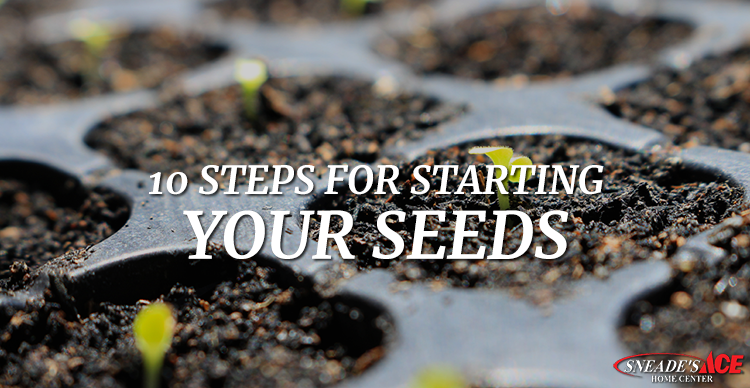
10 Steps to Starting Seeds

10 Steps to Starting Seeds
We can’t think of a better way to chase the winter blues away than gardening. The feel and smell of the earth take us to that special place. While it may be too cold outside to get out the gardening tools, this is the perfect time for a little indoor planting. Now is the season for starting seeds! Nothing is more exciting than seeing trays of rich fertile dirt sprouting the seedlings that will one day turn into your bountiful summer garden. Here are the steps to starting seeds.
1. Ideal Containers Can Be Key
Gather the perfect growing containers. Some of the options we like include:
- Seed-starting flats
- Toilet paper and Paper Towel Tubes
- Newspaper Pots
- Recycled Containers with holes poked in bottom (Single serving yogurt containers are great)
Make sure to place your containers in a leak-proof tray to prevent damage from dripping water.
2. Let There be Light!
Seedlings need an ample amount of light to thrive, ideally 12-16 hours. If you can invest, consider supplemental lighting. Set the lights up about 2-3 inches above the tops of your trays. Make sure to raise them as the plants begin growing. If you are growing in a window, choose a south-facing spot. Rotate the pots regularly. Also, make sure your plants are allowed to rest in complete darkness. Sufficient rest is as important as getting enough light.
3. Prepare the Soil
Always use fresh seed starting mix formulated for growing seedlings. Never use dirt from your garden or leftover potting soil you may have on hand. This could introduce disease to your vulnerable seedlings. Pre-moisten the mix before filling your containers. However, avoid adding too much water which will result in a muddy, slurry mixture. Fill your containers to about 1/2 from the top. Gently press down to remove air pockets.
4. Sow the Seeds
Follow the instructions on your seed packets regarding how deep to sow the seeds. Poke holes in the center of the soil and only sprinkle in 2-3 seeds. Cover the seeds with soil and gently press down. Once you finish, lightly mist the surface with water. You can speed up the germination process by covering your containers with plastic wrap or plastic domes. Remove once you see the first signs of green. Most importantly, make sure to label containers with the type of plant and sowing dates.
5. Water with Care
Keep the soil moist but not soggy. Consider misting with a spray bottle. Too much water will encourage mold growth. Drainage is also necessary to avoid root rot. Allow the soil to dry slightly between misting.
6. Feed and Fertilize
We encourage fertilizing once true leaves sprout. Vulnerable seedlings need nutrients, which the seed starting mix often lacks. Start slowly, using a half-strength fertilizer so you don’t burn the seedlings.
7. Survival of the Fittest
Ideally, each container should have only one plant which allows it to grow strong and not fight for space. If there are multiple plants, snip the weakest ones at the soil line.
8. Re-Pot to Larger Containers
Some seedlings may begin to outgrow their original containers before it is time to transplant outdoors. Once the roots fill the container, or they need constant watering, transplant to a larger vessel. Plastic, 16 oz. drinking cups are a perfect size. Use a good quality organic potting soil mix and pre-moisten as you did with the seed starting mix. Partially fill the containers and allow the root ball to sit about 1/2 inch from the rim. However, tomatoes are the exception: try to bury as much of the stem as possible.
9. Adapt Your Seedlings to the Outdoors
For maximum survival, it is best to harden off your seedlings to outdoor conditions. Therefore, they get used to sunlight, wind, rain, cool nights and less frequent watering and fertilizing. This period allows the seedlings to acclimate to normal conditions they will experience in the garden.
10. Transplant to the Garden
The Moment you’ve been waiting for! Once your seedlings harden off, they are ready for transplanting into their permanent location. Prepare the beds ahead of time. Till, fertilize, and pre-moisten the soil. Try to choose a cloudy day, or transplant in the late afternoon to give your plants time to adjust without the added stress of bright sunshine. Water the seedlings thoroughly after you plant them. You can add mulch, which helps retain moisture, although you need to keep it a few inches away from the stems not to smother the plants.
It is beyond rewarding to see your garden grow all spring and summer from tiny seeds you sprouted in the winter. And, we do not need to mention how delicious and healthy home-grown veggies are for you, your family, and friends. If you have any questions about starting seeds, the friendly staff at Sneade’s Ace Home Center has the answers. From seed starting mixes and trays to lights and other tools, our garden department has everything you need! Instructions and steps to starting seeds…another reason your Sneade’s Ace is the Place!